LEGO Harry Potter
Still got a ton to cover!
Half-Blood Prince: Riddle’s Secrets
 |
| Don't worry prof, luck is on my side! Literally! |
With the year’s end approaching, Harry decides to risk it all. He drinks down the vial of “Felix Felicis” as though it was liquid courage, and heads out to meet Slughorn. The LEGO adaptation of the film adaptation of the game yet again cuts a lot of elements out, including Ron Weasley’s better scenes (the most notable one being when he performs amazingly in a Quidditch match while thinking that he had drunk the liquid luck, even though his friends only made him believe he had).
 |
Meh... my sympathy for the giant spider
is roughly nonecistent. |
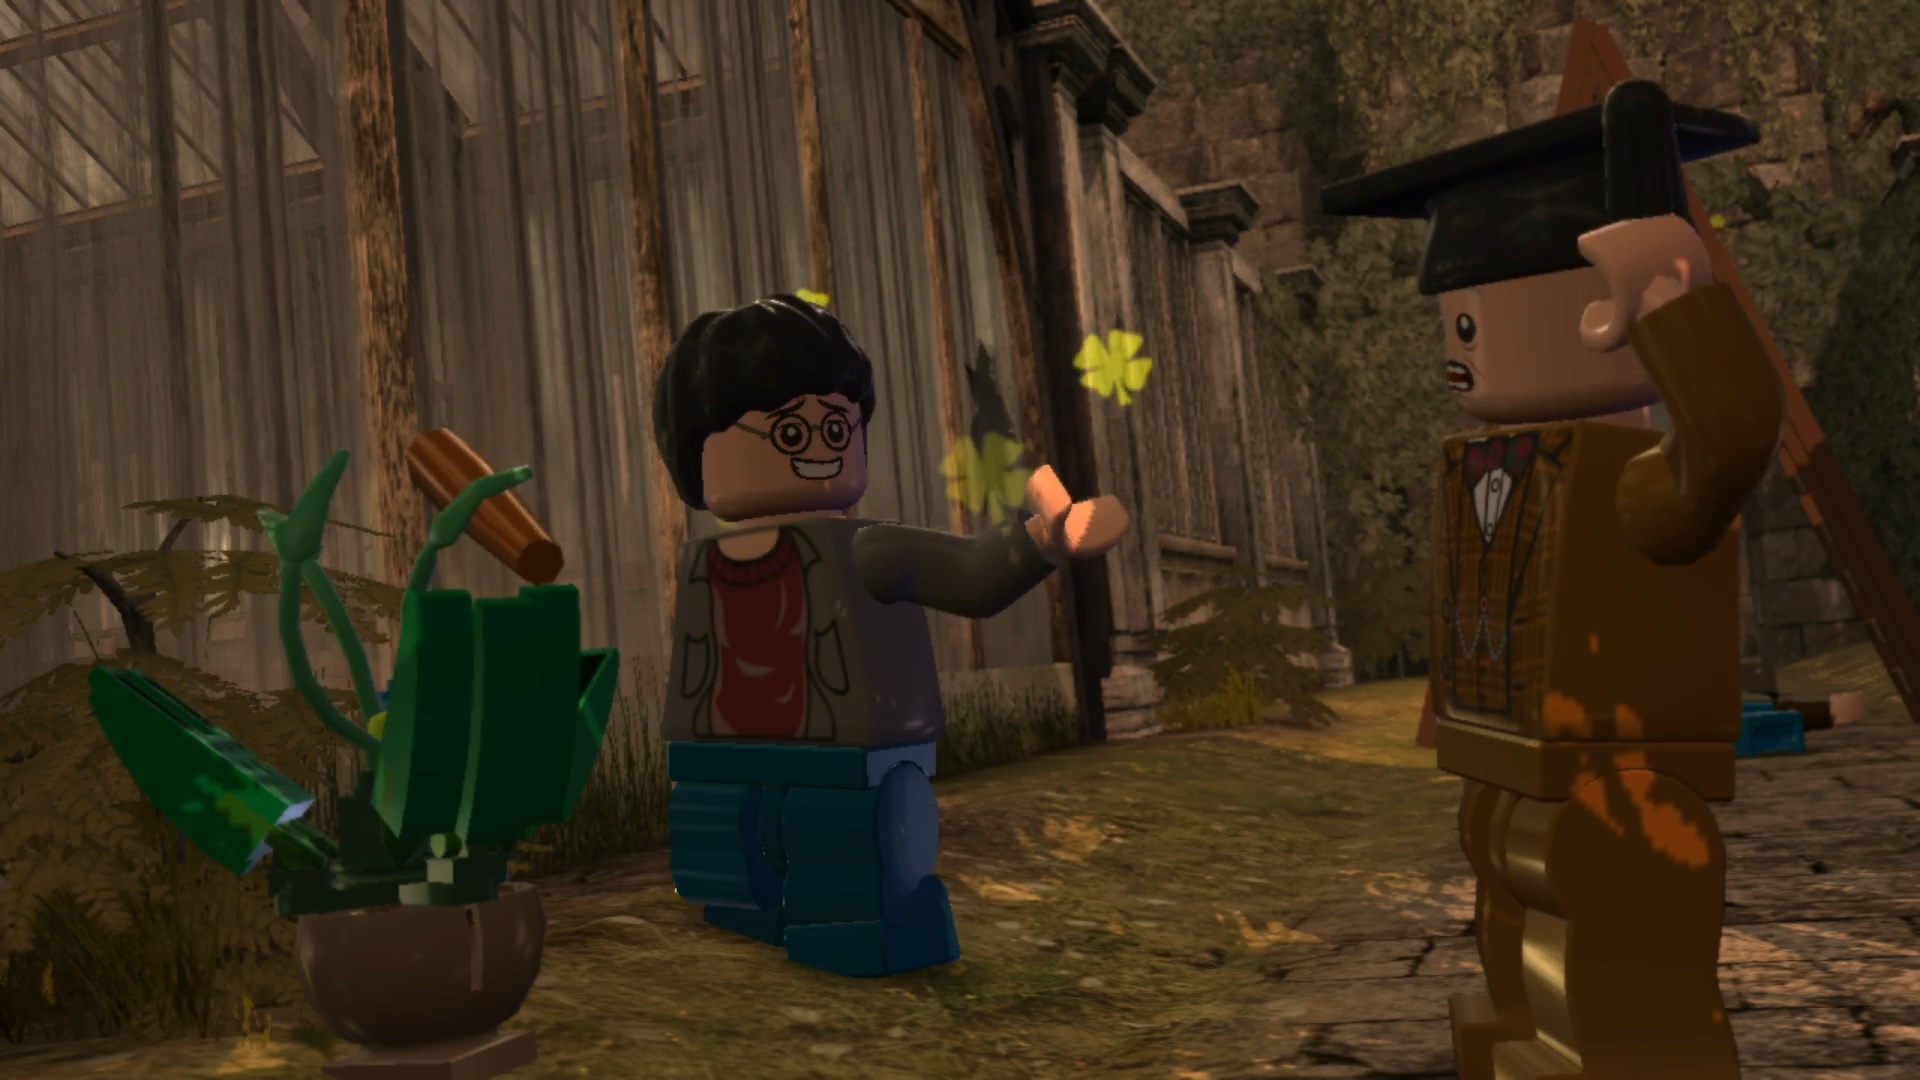
Harry finds the Slytherin professor in the Herbology sector of the school, then the two head over to Hagrid’s place where they see the half-giant mourning Aragog, the giant spider. Harry and the professor promise to help in the burial… but not before Slughorn gets liquids from the corpse for his potions first. After this, in the hut, Slughorn remembers Harrys mother Lily, one of his favorite students back when he was teaching at Hogwarts, and he thus accepts to share the memory he has of Tom Riddle.
 |
That IS a pretty clever way to show the number of Horcruxes.
And the ones we don't know about. |
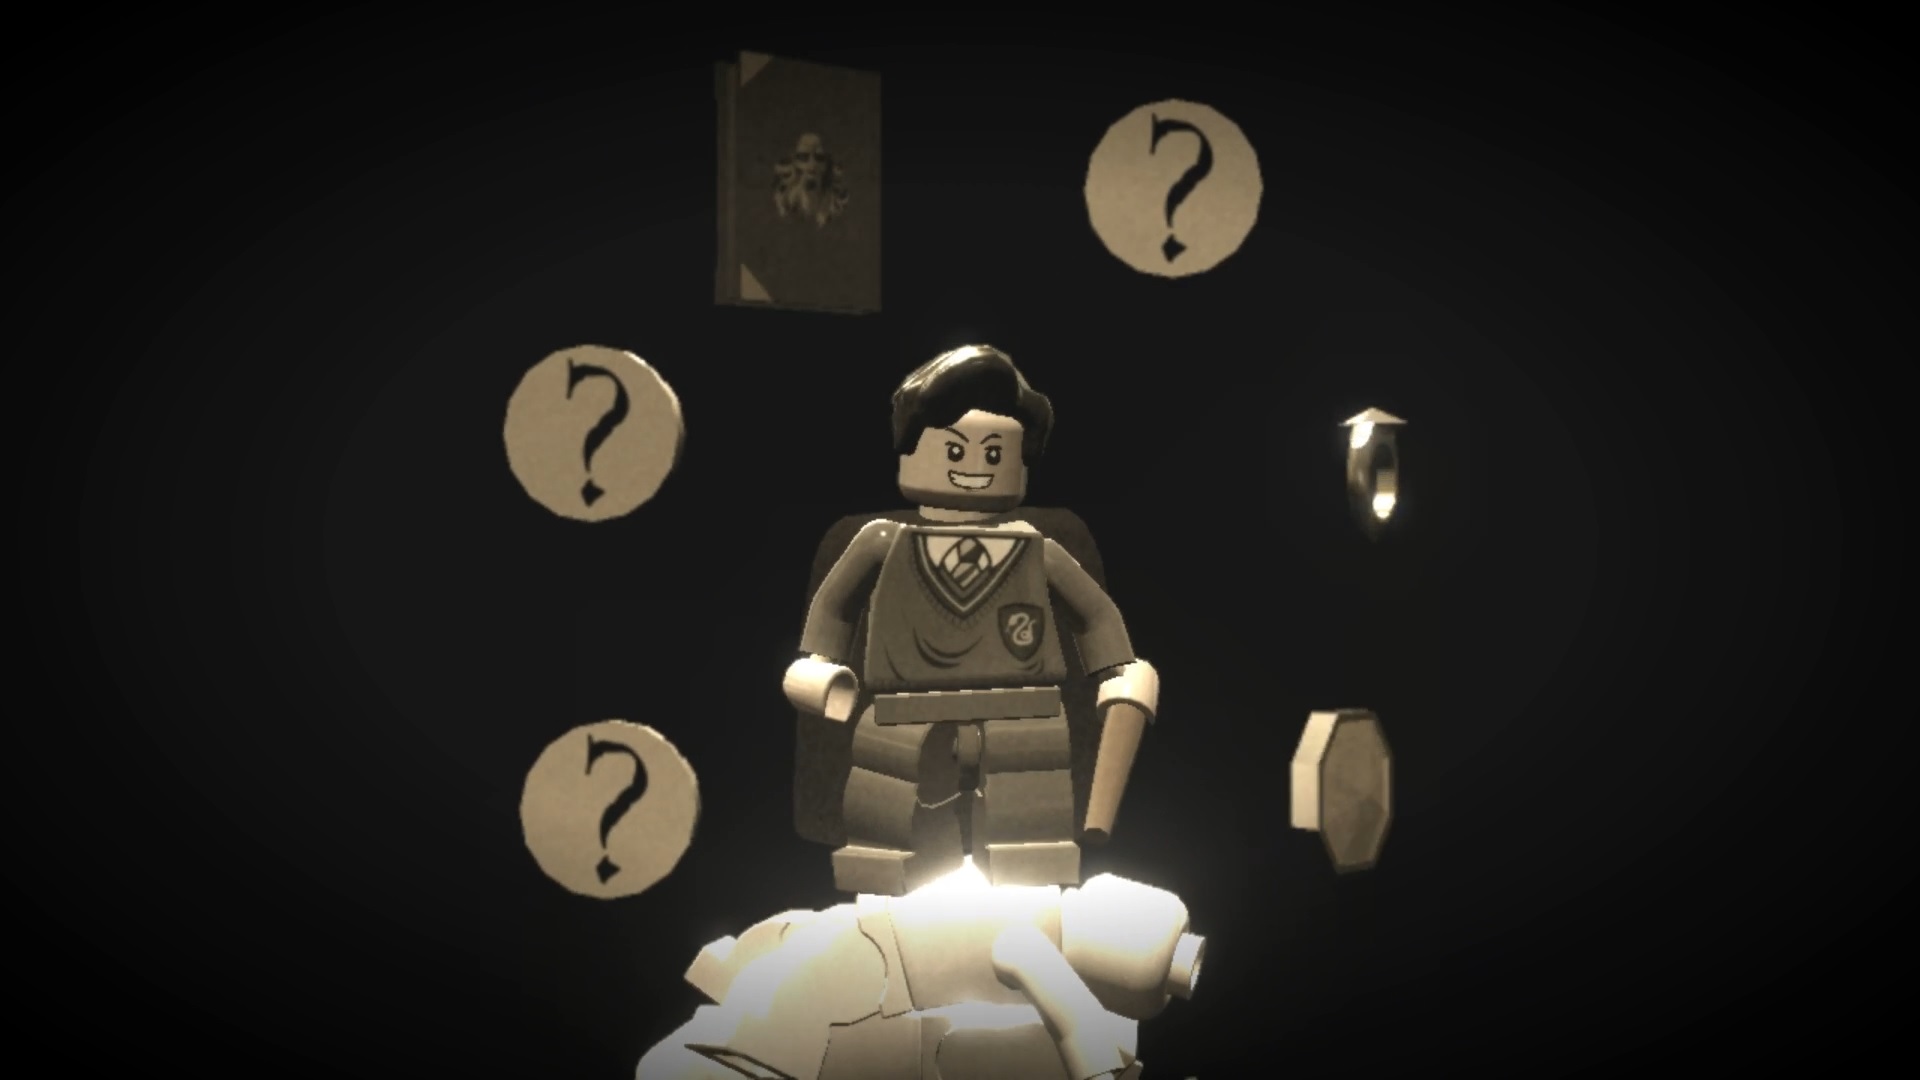
Harry checks the memory in Dumbledore’s Pensieve, and it shows Riddle discussing Horcruxes, a dark form of magic that involves hiding a fragment of soul in an item, and whether it would be possible to do so with multiple fragments of soul in multiple items. Slughorn supposes it could be; little did he know, that answer is what would take Riddle down the darkest path any wizard has ever taken. Once more, the game tries its best to communicate all this nonverbally, using images, movements and grunts. However, while we could still understand most of the plot in Years 1-4, this way of doing things unfortunately doesn’t work as well with Years 5-7, where a lot of important plot elements are nigh-impossible to explain without words. This being said, the game yet again assumes that you’re familiar with the source material – the films, more than the books – so it only explains the base minimum, leaving you to fill in the blanks. Oh, and they also inject comedy into all this.
 |
It's kinda hard to see with how dark it is, but there's Harry
down there fighting sorta-zombies and Dumbledore having
a tall glass of a potion that would make Buckley cough
syrup taste good in comparison. |
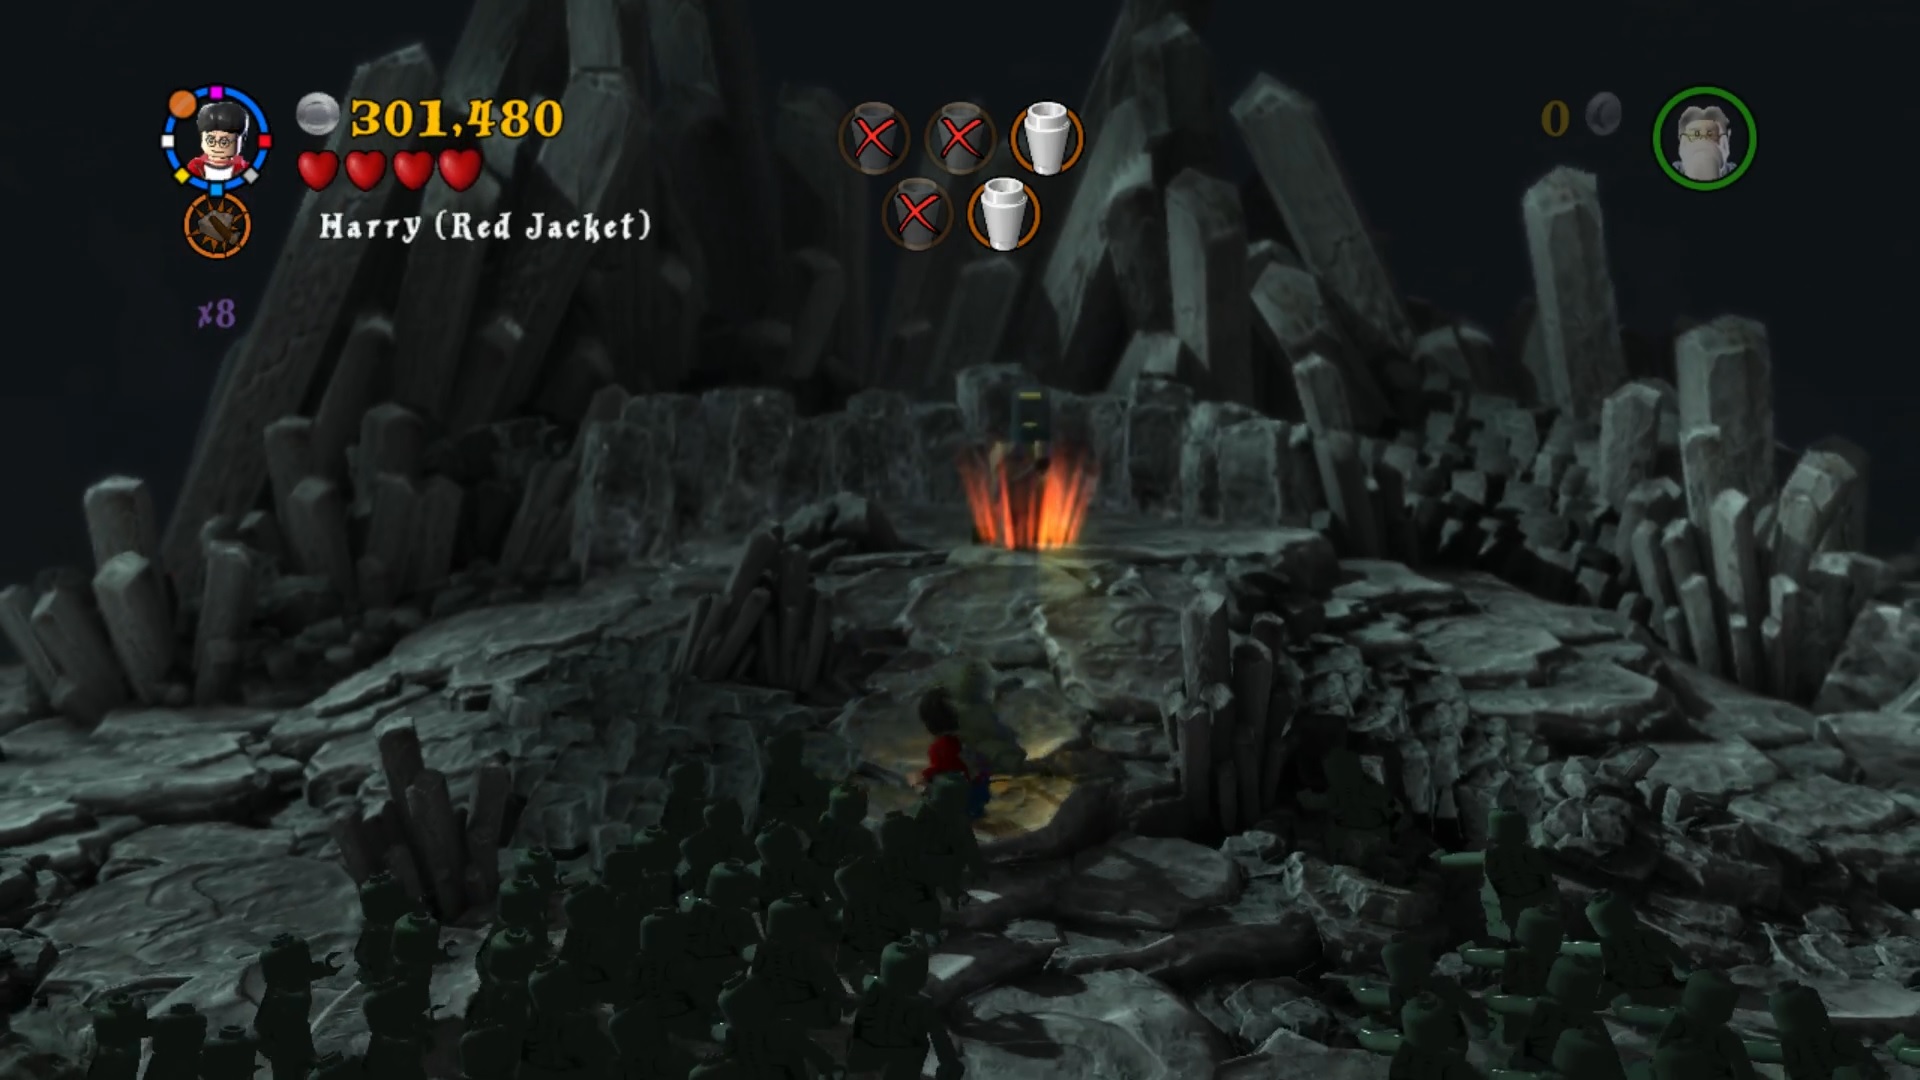
This leads to the final level of Year 6. Dumbledore takes Harry to a remote island to grab a suspected Horcrux. Harry has already destroyed one (Riddle’s diary), while Dumbledore also destroyed one (a ring). They go through a cave, then get to a pedestal with a potion in it. In the original tale, Harry had to force his headmaster to drink it all, with Dumbledore sobbing and pleading for his student to stop, after which they're attacked by Inferi, zombies created out of Voldemort’s hundreds of victims. Here? Most of it sticks, but instead of this being a struggle on all fronts, Harry has to Reducto the swarms of Inferi away while a barely-inconvenienced Dumbledore takes his sweet time to drink 5 cups from the pedestal, handily reworked as a water cooler.
The third Horcrux is picked up and the two return to Hogwarts where, to their shock, they find Bellatrix Lestrange and Fenrir Greyback, who came into the school through Draco’s Vanishing Cabinet in the Room of Hidden Things. The Death Eaters try to push Draco into killing Dumbledore with Avada Kedavra, but Draco doesn’t find the strength to do it. I hope you know the spoiler… Instead, it’s Severus Snape who comes in to kill Dumbledore.
 |
That face says everything: "I don't want to do
this, Albus... but you asked me to." |
See, when I said that the game assumes you know the spoilers, I mean it; we already know that the Headmaster was secretly dying, with his left hand showing signs of rot caused by his attempts at breaking the ring Horcrux. In the LEGO game, Albus’ right claw hand is already visibly blackened during the events of this arc, with scenes where it tries to attack its owner, right out of Evil Dead. And he had asked Snape to end him, were there no other option. So, we do know that Dumbledore being killed by Snape was… heh… planned all along between them, with Snape then acting as a mole among the Death Eaters for the side of good.
 |
Not quite the epic duel, but then again, it makes
sense that Snape isn't giving it his all. |
Harry (and Ginny) give chase and try to attack Snape, with Harry even dueling and casting Sectumsempra on his teacher, but Snape deflects the spell, revealing himself to be the Half-Blood Prince. The Death Eaters flee after wreaking havoc around the school grounds, and the students and faculty of Hogwarts hold a funeral for their headmaster. Meanwhile, Harry, Ron and Hermione agree to go on a quest to find and destroy the remaining Horcruxes… all four, as it turns out that the locket found in the cave was fake.
Deathly Hallows: The Skimming of the Plot
 |
| That's a lot of Potters. |
Deathly Hallows is a massive book on its own, with scenes all over the Wizarding World. The movies split that book in two parts to show everything (and not end up with a 4-hour film)… and after that every major franchise felt the need to do the same for their own finale, but that’s beside the point. Harry, Ron and Hermione’s trip doesn't reach Hogwarts until late into the story, meaning that many events take place in entirely new environments. We also get 12 levels for Deathly Hallows instead of 6. How does the game fare?
 |
| At least the scene on the highway is kept in. |
Well… Let’s say it skims a lot. We start with the first level, the Battle of the Seven Potters, where six other people use Polyjuice potion to disguise as Harry in order to confuse and divide the Death Eaters while the protagonists and their allies flee for safety. From this point, Polyjuice is finally available, meaning you can use alternate characters in the hub worlds. Seven teams fly away from the Dursleys’ and towards the Burrow. In the LEGO version, Hedwig doesn’t die because we need her to deliver red bricks to the hub; but characters like Moody, who originally die in this scene, are still never seen again – and their death isn’t mentioned, either.
 |
Deluminate and reluminate to your heart's
content! |
At the Weasleys’, a wedding is being prepared for Bill Weasley and Fleur Delacour. The trio meets Rufus Scrimgeour, who hands them items from Dumbledore, as requested in the headmaster’s will. Harry gets the Golden Snitch he caught in his first year. Ron gets the Deluminator, which replaces Lumos Solem among his spells, and allows him to grab a light from a source and move it somewhere else to solve puzzles. Hermione gets a book, the Tales of Beedle the Bard; she also now has a bottomless bag from which she can pull damn near anything, on spots marked by a pink LEGO floor. You put these new abilities to use in the last part of the level, where Death Eaters attack the wedding and the teens run away into the Muggle world.
 |
| Like we needed more reasons to hate the Pink Tyrant! |
 |
Honestly? Umbridge should have stayed just as
weak, magic-wise, as she was in the book and
film. She shouldn't put up a fight. She does
not deserve to be cool. |
After a fight against Death Eaters in a diner, the three learn about the fall of the Ministry to Voldemort’s forces. And who do they see but that dear Dolores Umbridge, sporting the real locket of Slytherin. The teens use Polyjuice to infiltrate the Ministry as adults and we get our second level, which starts with a search around the place for that damn Umbridge and her damn locket, finding her in a room where the pink tyrant is putting on trial any Muggle-Borns and their sympathizers. Once again, that woman is cooler here than in the book and film; she puts up an impressive boss fight, we even have to beat her and one of her lackeys in duels. The teens manage to knock her out and take the locket, then run away from hordes of Dementors. They have no other choice but to hide into the wilderness, all while looking for a way to destroy the locket.
Deathly Hallows: The Wilds
 |
| Weird time for camping out, but okay. |
 |
| I wished camping was this cozy. |
From this point on, we’re in the Wilds, connected environments that we unlock as the plot progresses. The previous ones are always accessible, so we won't lose any unlockables left behind (some are locked behind red sparkles, meaning we'll have to come back with an evil character anyway). The heroes can always return to their tent, which is bigger on the inside just like a certain famous British show’s blue police box. Ron has taken on the duty of wearing the locket, and its dark magic is doing a number on his mood, to the point where he even leaves the team. Inside the tent is also the Marauders’ Map, which allows the player to follow a second set of characters in Hogwarts (Luna, Neville and others), meaning that the castle is still available for exploration during this arc.
 |
| And now they have their own progress tracker! |
 |
| Can you see Nagini? She sees Harry and Hermione... |
Looking for more Horcruxes around Christmastime, Harry and Hermione stop by Godric’s Hollow, a small village. They begin the third level inspecting nearby tombs, which yields little results; they’re then invited inside the nearby home of Bathilda Bagshot, author of wizard history books. However, something's off about her… Gee, may it be the serpentine tongue? Sure enough, the disguise falls and the teens face Voldemort’s snake Nagini, in yet another cool boss fight in steps. It feels like Years 1-4 were criticized for having easy or otherwise bland boss battles, so the sequel is compensating. Nagini is defeated, but still dangerous, so the two teleport out of the house.
 |
Reminder that this is winter, and they're diving
underwater in their undies. Good thing LEGO
minifigs don't feel the cold. |
Later that winter, Harry finds the Sword of Griffindor deep in a frozen lake, and remembers that it has absorbed basilisk venom, which is what destroyed Riddle’s diary; so it can destroy Horcruxes. He dresses down to grab it. Who returns to help? Ron! The redhead also dresses down, and the fourth level sees the two diving underwater for the sword. Much like the second task from the Triwizard Tournament, that segment is on a 2D plane, avoiding headaches of an underwater 3D level. Back on the surface, Harry speaks some Parseltongue to awaken the soul fragment, and… all Hell freaking breaks loose.
Damn, what an amazing boss fight.
 |
That whole mass of darkness... just wow.
Coolest boss fight in the whole 2-game series. |
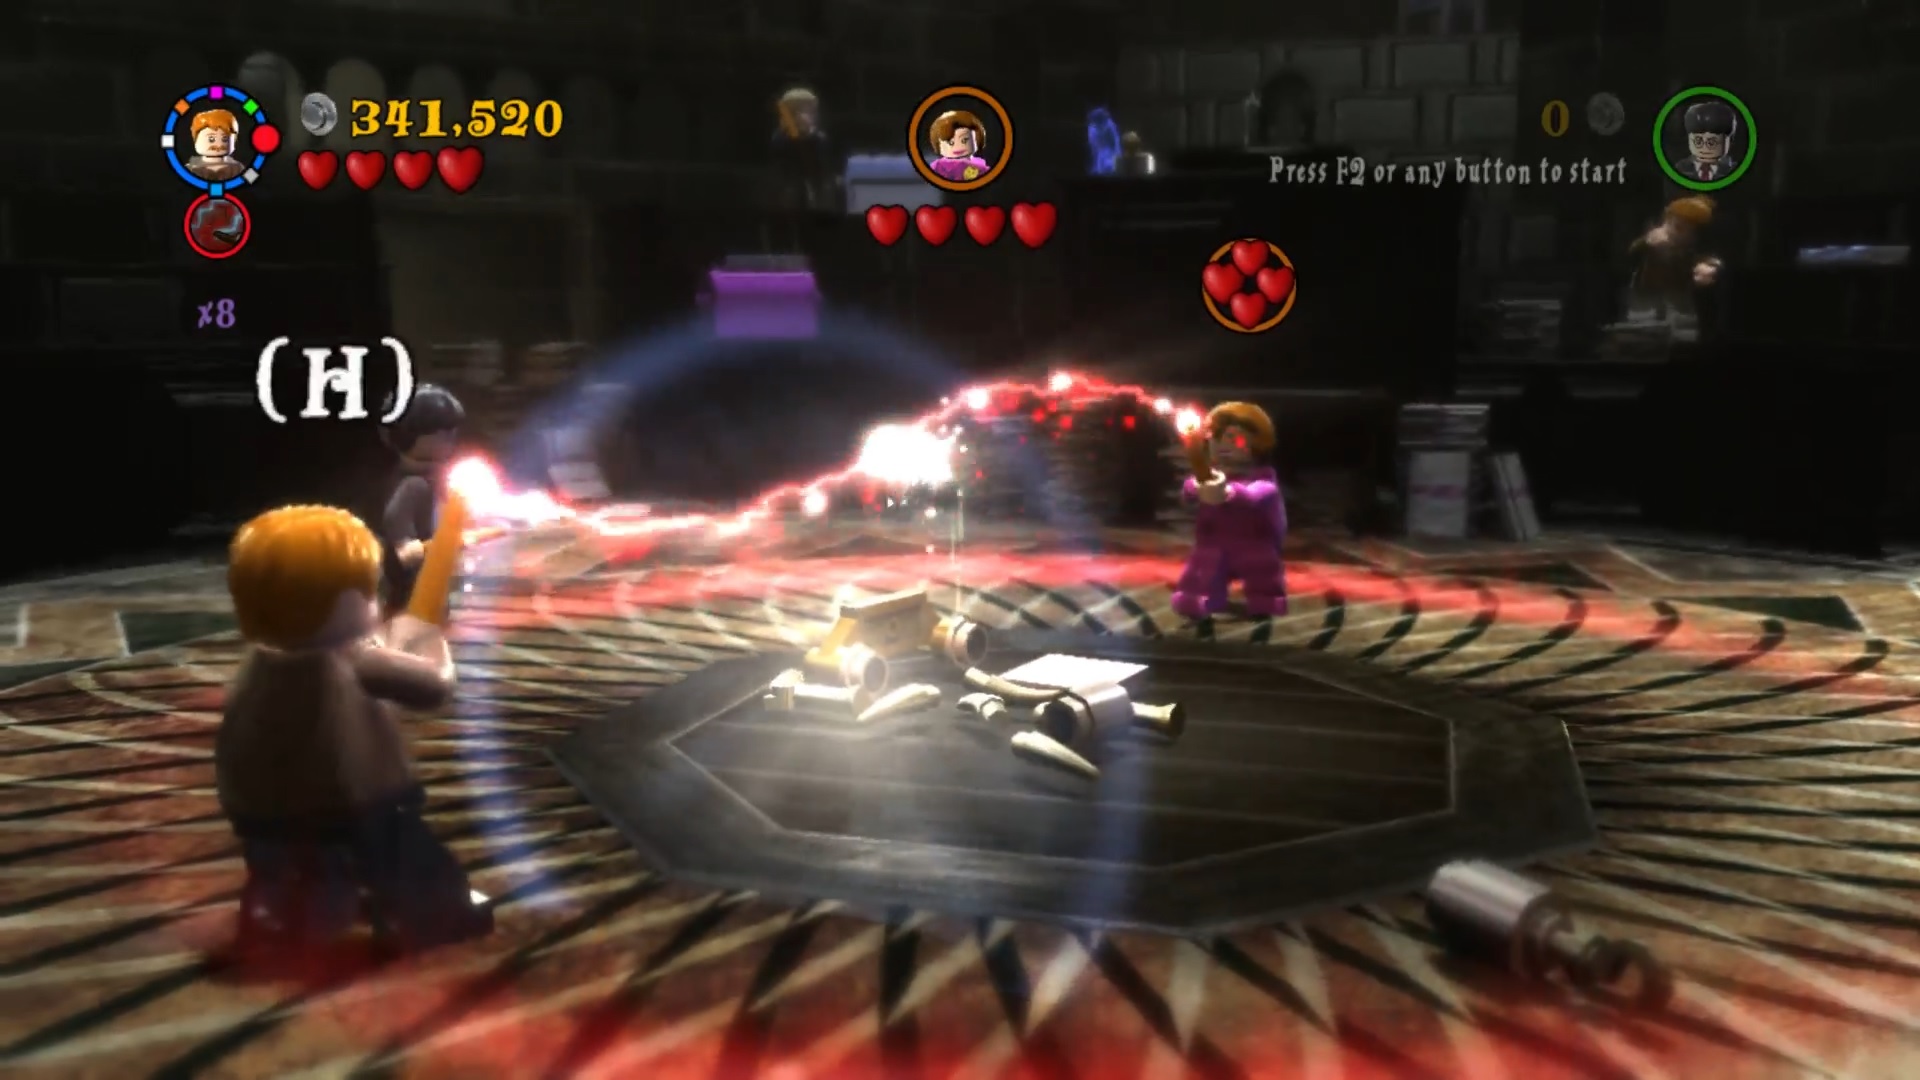
In it, Ron’s only available action is to slash with the sword at a precise spot on the field (where the locket is); Harry does the rest. After each successful hit, the mass of darkness enters a new phase. At times it will blow the two further away and the challenge is to walk up to the spot to attack. It will also throw shadow skulls, summon spiders (that you must throw back at the mass to incapacitate it), and even create a lifeline based on the jealousy-based visions the locket gave Ron in his darkest moments while he was wearing it, forcing you to push said visions away before you can strike a final time. Damn, this was great.
That’s one more down, three to go. But what are they?
Deathly Hallows: The Three Brothers
 |
| It even uses the same sepia feel as the animated segment. |
Seeing a logo in "Tales of Beedle the Bard", Hermione recalls seeing that same logo on a necklace worn by Luna's father Xenophilius. They visit Lovegood, not aware that Death Eaters came by earlier, kidnapped Luna, and threatened to hurt her if her dad said anything. As a result, not only is the door locked, but once we're inside, Xenophilius is uncooperative. The man is eventually forced to explains that the logo represents the Deathly Hallows, three items allegedly given by Death itself to three brothers: The Elder Wand, the Resurrection Stone and the Cloak of Invisibility. The first two suffered grisly fates after obtaining their items and were taken by Death, but the third hid under the Cloak and, when his time came, passed it onto his son before “greeting Death like an old friend”. The animated sequence from the film is a playable segment in which we control the three brothers with their respective abilities, outsmarting Death until the end, but the tale’s plot beats eventually occur anyway. After this, Harry, Ron and Hermione try to save Luna, thinking she’s in danger in the house; nope! It was Xenophilius in disguise. Well, load of good that did.
 |
As it turns out, we can build stuff even without
Wingardium Leviosa. Come on, wizards. Show
some handiwork for once. |
Shortly after this, back in the wilderness, the trio is ambushed by snatchers, captured and taken to Malfoy Manor, where they’re imprisoned and their wands are taken away. Other people have been captured as well: Luna Lovegood, Griphook the goblin and Ollivander the wand-seller. Hermione is not with them, as Bellatrix had much nastier ideas involving the Muggle-born. It’s up to the prisoners to team up and… solve puzzles to escape. Yep, same old. Through a mirror the group finds, they get into contact with Albus Dumbledore’ brother Aberforth and Dobby, in Hogsmeade; Dobby travels through the mirror and takes Luna and Ollivander to safety before coming back to help Harry and Ron in rescuing Hermione.
Upstairs, Bellatrix is asking Hermione about the Sword of Griffindor and how it was found. A weird boss battle ensues when Harry and Ron arrive. You duel either Draco or his mother Narcissa, then fight to inflict one point of damage to Bellatrix, then re-duel the Malfoys to then hit Bellatrix again, then fight the mother and son together in the classic “throw back with WL the item they send at you”, and finally, once the Malfoys are beaten, Bellatrix finally has to be beaten in a duel. …Phew!
 |
The duels are a cool concept for fights, but after
a while they all start to feel the same. |
 |
It's like I said in Years 1-4: For a minifig,
dismemberment means DEAD dead.
|
Dobby causes a distraction and almost Apparates away with the protagonists, but Bellatrix throws a pile of junk that also gets teleported and crushes Dobby when they reappear (compared to the original where she throws a knife that stabs the house elf). The end result is the same; Dobby dies in Harry’s arms, and the friends give the elf a proper funeral and burial. Meanwhile, Voldemort blasts Dumbledore’s tomb open and steals the Elder Wand from the Headmaster’s corpse, now believing to have attained the ultimate power…
This closes the seventh movie… but we have 6 more levels in Deathly Hallows!
Deathly Hallows: Road to Hogwarts
 |
That scene was a lot more tense - and a lot more packed
with duplicating items - in the film. |
In the abandoned house near Dobby’s grave, the teenagers talk with Griphook about a Horcrux that they heard may be in Bellatrix’s vault in Gringotts. The goblin reluctantly agrees to bring them in, but only if he gets the Sword of Griffindor as payment. Hermione and Ron use Polyjuice to disguise as Bellatrix and her husband, while Harry and Griphook follow under the Cloak. After some role-playing and magical convincing, we get the seventh level: The heist. Down into the caves, in an area guarded by a dragon, the team gets their hands on the Horcrux, which is Hufflepuff’s Cup.
 |
How often in the LEGO games do you get to
control a giant friggin' dragon? |
However, the group is backstabbed by Griphook, who agreed to let them in but never promised to let them leave; he flees with the sword, depriving them from their anti-Horcrux weapon. Harry, Ron and Hermione manage to take control of the dragon, and take out five goblins in the vicinity before they escape on the beast’s back. After dropping off the dragon, Harry has a vision of Voldemort visiting Gringotts, seeing the Sword disappear from a dead Griphook’s hand, and finally understanding that Harry Potter is Horcrux-hunting. Voldy instantly worries for Ravenclaw’s Diadem, one of the items he cursed, and which he hid within Hogwarts.
Harry, of course, got all of that info without any words. The teenagers thus have to infiltrate the castle, which has been turned into a school for the dark arts by its new headmaster… Severus Snape.
 |
| Hmm, Death Eater sauté on Reducto flame. |
The heroes arrive at Hogsmeade, where they plan to reach Hog’s Head Inn, owned by Aberforth. You can sneak through the village… or bust through the hordes of Death Eaters patrolling it. We get to the Hog’s Head and Aberforth explains his family link with Albus. The elderly wizard also reveals that students working in secret from within the school have created a passage between the inn and the Room of Requirement, which Harry, Ron and Hermione use to arrive in the school. Folks, we’re back in!
 |
Back to sender - it's not like this is the
twelfth boss fight using that mechanic! |
Snape has heard of Harry’s return and, in a gathering attended by the students, requests that the Chosen One be brought to him. Harry reveals himself and teams up with Professor McGonagall to take down Snape’s two lackeys through duels. They then battle the traitor. Yep, once again, he just throws shit at us and we throw it back at him. Dude, I’ve been doing this kind of boss fight since freaking Sorcerer’s Stone. Snape tops it off with a duel against McGonagall, which he loses. Snape and his lackeys flee, and the school’s staff and students (well… most of them) announce their desire to back Harry in the upcoming battle.
Voldemort is going down.
This is the perfect moment to end this part; we’ll finish in Part 3.